Buttermilk Biscuits with Sausage Gravy


I opened my emails this morning to find the top one from my hubby.  We do live in the same home, this is just another way of us to communicate when he is up late at night and wants to tell me something or show me something when I am sleeping.

Here it was:

http://www.recipe4living.com/recipes/biscuits_and_gravy.htm

Ingredients

  • 1 lb. Jimmy Dean premium pork or turkey sausage
  • 3 Tbs. corn starch
  • 3 C. milk
  • 1 Tbs. butter
  • 1 can. pre-made biscuits (i.e. Grand’s home style)

Directions


Preheat oven to 350 degrees. In large skillet, cook sausage until fully cooked. When cooked, do not drain. Add butter, and cornstarch, stir until cornstarch is dissolved into the sausage. By this time you’ll want to start putting your biscuits in the oven, bake for 15-20 minutes or until golden. Once done, slowly begin to add the milk to the gravy mixture.  Add about a cup each time continuously stirring. Season to taste. Pour your gravy on your biscuits to serve.

http://www.recipe4living.com/recipes/homemade_sausage_gravy_and_biscuits.htm

Ingredients

  • 1 lb. Tennessee pride mild sausage
  • 1/2 gallon milk
  • 8 biscuits
  • Salt and pepper to taste
  • Corn starch

Directions


Break up and brown sausage well. Drain and add salt and pepper, mix until brown. Add milk a little at a time to get it brown. Let it cook down until it’s brown again, then add remaining milk. Simmer 15 minutes. Stir well, add corn starch to thicken. Serve over hot flakey biscuits.

http://www.recipe4living.com/recipes/mind_blowing_buttermilk_biscuits_recipe.htm

Time needed

15 min preparation + 12 min cooking

Serving Size / Yield

6 servings

Ingredients

  • 2 C All purpose flour
  • 1 Tbs Baking powder
  • 2 tsp Sugar
  • 1/2 tsp Cream of tartar
  • 1/4 tsp Salt
  • 1/4 tsp Baking soda
  • 1/2 C Lard (or shortening)
  • 2/3 C Buttermilk (or sour milk)

Directions

In a medium mixing bowl stir together flour, baking powder, sugar, cream of tartar, salt, and baking soda. Using a pastry blender, cut in lard (or shortening until mixture resembles coarse crumbs. Make a well in the center of dry mixture, then add buttermilk (or sour milk) all at once. Using a fork, stir (just until moistened).
Turn the dough out onto a lightly floured surface. Quickly knead the dough by gently folding and pressing the dough for 10 or 12 strokes or until the dough is nearly smooth. Pat or lightly roll dough to 1/2 inch thickness. Cut dough with a floured 2 1/2 inch biscuit cutter, dipping the cutter into flour between cuts.
Place biscuits on an ungreased baking sheet. Bake in a 450F oven for 10 to 12 minutes or until the biscuits are done. Remove biscuits from the baking sheet and serve hot.


I think he was trying to give me a hint to change to gluten free flour and rice or potato starch and make this lol…

Will make and record just had to share…

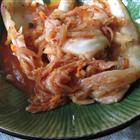
Kimchi How to make and Keep it


I found two similar recipes for it and my hubby has found an amazing way to store it since we can’t get the actual Korean Kimchi storer from Tupperware.  We came up with the next best item from Tupperware.

pickadeli1

This is an 8 1/2 cup or 2 L container

http://www.trifood.com/kimchi.asp

Kimchi is a national Korean dish consisting of fermented chili peppers and vegetables, usually based on cabbage. It is suspected that the name kimchi originated from shimchae (salting of vegetable) which went through some phonetic changes: shimchae > dimchae > kimchae >kimchi.Common ingredients include Chinese cabbage, radish, garlic, red pepper, spring onion, ginger, salt, and sugar. While kimchi is generally identified internationally as Chinese cabbage fermented with a mixture of red pepper, garlic, ginger, and salted fish sauce, several types of kimchi exists, including regional and seasonal variations. There are variants, includingkkakdugi, based on radish and containing no cabbage.

Kimchi has been cited by Health Magazine as one of the world’s five “healthiest foods”, with the claim that it is rich in vitamins, aids digestion, and may even prevent cancer. The health properties of kimchi are due to a variety of factors. It is usually made with cabbage, onions, and garlic, all of which have well-known health benefits. It also has active and beneficial bacterial cultures, like yogurt. Lastly, kimchi contains liberal quantities of red chili peppers (gochugaru) which has been suggested to have health benefits as well.

The best tasting kimchi is stored in room temperature for an average of six months to reach its full flavor.  It is a popular side dish but is also often used as an ingredient in cooking other popular Korean dish, including kimchi chigae (kimchi soup) and kimchi bokumbop (kimchi fried rice).

Fun fact: Like the McDonald’s University of Hamburgers in Illinois, US, there is a Kimchi Research Institute located in Pusan National University, South Korea.

RECIPE INGREDIENTS
  • Head of Napa cabbage – about one pound
  • ¼-⅓ cup red chili pepper flakes
  • 1 tbsp minced garlic
  • 1 tbsp minced ginger
  • 3-4 green onions, sliced
  • 2 tablespoons anchovy or fish sauce (optional)
  • ½ yellow onion
  • ½ ripe apple
  • ½ ripe Korean pear
  • Sea salt
  • Water
COOKING DIRECTIONS
  1. Separate cabbage leaves and chop into bite-size pieces.
  2. Dissolve a quarter cup of sea salt in a bowl of warm water then pour salt water over cabbage leaves. Give cabbage a gentle toss to distribute salt water. Allow salted cabbage to sit for at least four hours.
  3. Give cabbage a good rinse to remove excess salt then transfer cabbage to a large bowl.
  4. Combine a quarter cup of fine red chili pepper flakes with warm water, stir gently with a spoon to create a red chili paste, then transfer chili paste to cabbage.
  5. Add minced garlic, minced ginger, green onions, and fish sauce.
  6. Blend yellow onion, apple, and pear with one cup of water, then add this natural sweetener to the cabbage.
  7. Put on a pair of plastic gloves and give everything a thorough toss and rubdown. You want to evenly distribute all ingredients, especially the red chili paste.
  8. Transfer seasoned cabbage leaves into a large glass bottle. Be sure to use firm pressure with your hands to push down on cabbage leaves as they stack up inside the bottle.
  9. Transfer any liquid that accumulated during the mixing process into the bottle as well – this liquid will become kimchi brine. Some liquid will also come out of the cabbage leaves as you press down on them as they are stacked in the bottle.
  10. Be sure to leave about 2 inches of room at the top of the bottle before capping it tightly with a lid. Allow bottle of kimchi to sit at room temperature for at least 24 hours.
  11. Refrigerate and take out portions as needed. The refrigerated kimchi will continue to ferment slowly in the refrigerator over time. So long as you use clean utensils to take out small portions, it will keep for up to a month in your refrigerator.

http://allrecipes.com/Recipe/Spicy-Cabbage-Kimchi/Detail.aspx?prop24=RD_NextRecipe

492927834391


2 of 2 photos

Serves: 56 change »

Prep Time: 1 Hour

Ready In: 4 Days 7 Hours

Ingredients
 2 heads Napa cabbage
  • 1 1/4 cups sea salt
  • 1 tablespoon fish sauce
  • 5 green onions, chopped
  • 1/2 small white onion, minced
  • 2 cloves garlic, pressed
  • 2 tablespoons white sugar
  • 1 teaspoon ground ginger
  • 5 tablespoons Korean chile powder
Directions
1.
Cut the cabbages in half lengthwise and trim the ends. Rinse and cut into pieces about 2 inch square. Place the cabbage into large resealable bags and sprinkle salt on the leaves so they are evenly coated. Use your hands to rub the salt in to the leaves. Seal the bags and leave at room temperature for 6 hours.
2.
Rinse the salt from the cabbage leaves and then drain and squeeze out any excess liquid. Place the cabbage in a large container with a tight fitting lid. Stir in the fish sauce, green onions, white onion, garlic, sugar and ginger. Sprinkle the Korean chile powder over the mixture. Wear plastic gloves to protect your hands and rub the chile powder into the cabbage leaves until evenly coated. Seal the container and set in a cool dry place. Leave undisturbed for 4 days. Refrigerate before serving, and store in the refrigerator for up to 1 month (if it lasts that long!).

Enjoy the Kimchi and keep it fresh

What is in the Fridge Today?


As I walk to my fridge and look I am faced as many women with the task of being inventive and still staying on budget.

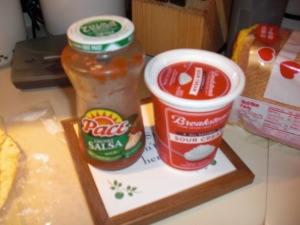
So far my ingredients include

CIMG2499CIMG1380

CIMG0223

CIMG1381

CIMG2496

Perhaps some chicken or beef…have not decided yet but this is my starting block for dinner.  Since it is not grocery day I have to work with what I have in the house.  I do not feel like soup so a type of empanada it is.

Hubby was no help when I asked him what he wanted and he said whatever I am having.

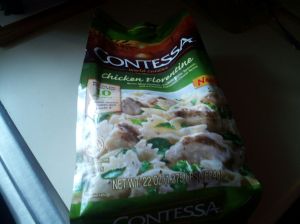
As I am going through our mini freezer, what do I stumble upon but a ready made meal.

meal in a bag

I will have to take an allergy pill but with coupons I paid next to nothing for this and the chicken was on sale too.

Contessa makes a great line of quick meals for two. Or for one with leftovers for next day. Look for coupons as they are always available too.  I add meat to mine as hubby likes lots of meat.

chicken

Perdue is now feeding their chickens without chemicals and organic.  They are not abusive so I try to stay clear of off brands that might be a deal but not good.

Thank goodness for coupons and being able to use them…

I guess the left over chicken will be the empanadas of tomorrow… and dinner is made for tonight…so I can clean today.  Yeah! I need to read the 12 secrets to planning meals why don’t you peek at it too?  Tell her I sent you please…Thank you.

One of my readers http://stuphblog.wordpress.com has asked what is an empanada so here I am adding an explanation of one of the easiest meals to make for a quick dinner.

CIMG1378

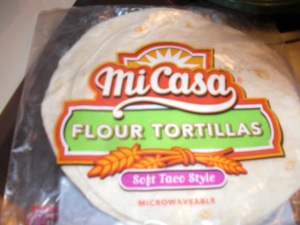
You start with an shell…CIMG1380

I love this brand as it is made with flour base that does not have bromine and no Corn…

CIMG1379

I add my hubby’s favorite cheese

CIMG0057

Medium Heat on the stove for the frying pan or griller

CIMG1345

I spray the pan with Pam to not have a greasy empanada

chicken

I cut my chicken into strips and brown them on both sides or brown hamburger or stew beef or turkey burger….

Here is where it gets fun….

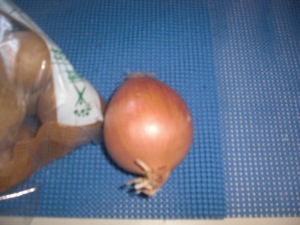
You can add…Onions

CIMG2496

Diced up and brown in the meat while it is cooking

Green peppers or hot peppers if you so choose

Spinach if you want to be healthy

CIMG2509Then set aside after cooked and partially cooled.

In a clean pan that has been sprayed with the Pam cooking spray

Add your tortilla shell then on half of the shell add your meat mixture.  Around the edges I sprinkle my favorite cheese as well as across the top.

Then fold over the other half so that it seals with the cheese. Press down with your spatula.  Brown on both sides then serve with

CIMG1381

This is to dip your empanada in

Enjoy

Tammye Honey