New Bisquick Gluten and Corn Free


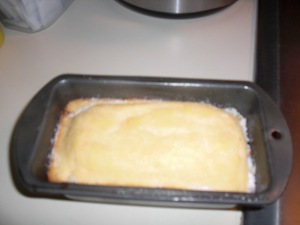
I had extra strawberries that I had to use up so I decided to make some short cakes to go with them with the new Bisquick I had found the last shopping trip.

With the recipe on the back and my muffin tin…it was a breeze and a quick and easy dessert that both my hubby and I can enjoy…
Since my camera is shy today…here is this recipe…

4 cups (1 qt) strawberries, sliced

1/2 cup sugar

2 1/3 cups Bisquick Gluten Free Mix

1/3 cup butter or margarine (I softened)

3/4 cup milk

3 eggs beaten

1/2 tsp vanilla

3/4 cup whipping cream, whipped

Mix strawberries and 1/4 cup of sugar (unless you like sweeter, add more); set aside.

Heat oven to 425F.  Grease cookie sheet or do what I did and place in muffin tins which I sprayed with butter Pam cooking spray.

In medium bowl, combine Bisquick mix, and remaining 1/4 cup of sugar (or a trace more for a sweeter roll) ; cut in butter with pastry blender or fork.  Stir in milk, beaten eggs and vanilla.  Drop by spoonfuls onto cookie sheet or place into muffin tins and I had enough to make a small loaf also.

Bake 10-12 min or until light golden brown Cool 5 min.  With serrated knife, split short cakes; fill and top with strawberries and whipped cream.

While warm I sprinkled sugar across top to give a nice sprinkle look.

Ate one for dessert…very filling.

Happy Cooking.

Namaste

Tammye Honey


Baking with Corn Allergy


  1. Keep staple baking ingredients such as yeast, cream and butter on hand. This way, you can whip something up without having to go to store to get the necessary ingredients. It doesn’t quite overcome the convenience of prepared foods, but it sure helps to satisfy cravings. Yeast can be stored in the fridge and butter in the freezer for months.
  2. Get rid of the baking powder! It has cornstarch in it. If you can’t find Featherweight Baking Powder (made with potato starch), use 1/2 teaspoon cream of tartar and 1/4 teaspoon baking soda for 1 teaspoon baking powder. I’ve been doing this for years, and no one has noticed a difference in my foods, even biscuits.
  3. Make your own vanilla. Buy a 750 ml bottle of potato vodka, stick 2 vanilla beans in it, and let it sit for a month or two. Yummy, and actually cheaper than pure extract. I have heard that Frontier’s vanilla has corn alcohol in it, but their other extracts seem to be safe (I use them).
  4. Use this substitution for corn syrup: 1 cup corn syrup = 1 cup sugar plus 1/4 liquid (water or whatever other liquid is called for in the recipe). I’ve also read that rice syrup can be substituted directly for corn syrup.
  5. Corn AllergensFor powdered sugar, add up to a tablespoon of potato starch to 1 cup sugar, and blend in a coffee grinder until it’s not grainy; I often run it through twice. I also keep a bowl of it handy for when I need it quickly; just stir or sift it first to break up any clumps.

http://www.cornallergens.com/food/corn-free-cooking-baking.php

Love this website for great tips when I need it desperately like today…

Happy Cooking

Namaste

Tammye Honey

Jolly Roger Cake


I found this cake recipe yesterday and it made me long to have children in the house again. It was so adorable that I just had to share it with you…

The recipe really seemed easy enough…

http://www.mydailymoment.com/recipes/jolly_roger_cake.php

Ingredients
      • 1 box cake mix
      • Water
      • oil
      • eggs
      • Tray 15 x 12 inches, covered
      • 1 cup creamy vanilla frosting
      • 1 chocolate-covered mint patty
      • 1 gumball
      • 1 slice marshmallow
      • 1 yellow ring-shaped hard candy
      • 1 roll Fruit by the Foot strawberry
      • 1 black licorice rope
      • Square-shaped candy-coated gum
      • Chocolate decors
Methods/steps
  1. Heat oven to 350 degrees. Grease bottoms and sides of 1 (8-inch) and 1 (9-inch) round cake pan with shortening or cooking spray. Make cake as directed on box, using water, oil and eggs. Pour into pans. Bake as directed on box. Cool 10 minutes; remove from pans to cooling rack. Cool completely, about 1 hour.
  2. Use serrated knife to cut 9-inch cake in half and cut hat as shown in diagram. Remaining half of 9-inch cake will form body of pirate. Cut 8-inch cake as directed in diagram. On tray, place cake pieces. Cut ears and nose from small pieces of cake; attach to cake with small amount of frosting. Cover; freeze 1 hour or until firm.
  3. Reserve 3 tsp. dark chocolate frosting; frost hat with remaining dark chocolate frosting. Mix vanilla frosting with reserved chocolate frosting. Frost head, ears, nose and body of pirate with tinted vanilla frosting. Add mint patty for eye patch, marshmallow slice and gumball for eye, and ring-shaped candy for earring. Cut fruit snack into shapes for stripes and mouth; place on cake. Cut licorice to fit hat. Add gum for teeth and chocolate decors for whiskers. Store loosely covered at room temperature.
At a glance
Main Ingredient
Cooking Method
Difficulty
Course/Dish
Healthy Eating
That is all there was to it…I thought what a neat idea.  Something new.  I am sure that the sweets on it are not good for you yet it is so cute to look at…
Enjoy…I have not made it since there is no one here to eat all of that cake…my two little men are still in Indiana for the funeral of their grandpa…so I have to wait for such an adventure so I can send it home to them….
Happy Cooking and Baking
Namaste
Tammye Honey

Braided Herb Bread in Bread Machine


This was a stumble upon find this morning so while I am baking my version I thought I would share the original with you…

http://www.beehiveandbirdsnest.com/2011/03/braided-herb-bread.html

Braided Herb Bread takes about 3-3 1/2 hours from start to finish, but most of the time is for rising and baking. I like to make the dough in my bread machine because it’s so simple. But you can just as easily make it in a mixer. Or by hand if you’re a total Luddite.

The ingredients:
1 egg, beaten
3/4 cup milk
1/2 cup water
1/4 cup butter (cut into 4 pieces)
4-4 1/2 cups flour
3 Tbs. sugar
1 1/2 tsp salt
1 1/2 tsp. dried marjoram
3/4 tsp. dried thyme
3/4 tsp. rosemary crushed (You can pinch it a bunch of times in your hand. Close enough.)
3/4 tsp. dried dill
2 packs yeast (or 4 1/2 tsp if you have bulk yeast. I prefer instant or quick rise.) Respect the expiration date. If the date has passed, throw it out. Trust me.

(If you don’t have all of these spices just omit whatever.)
In a microwave-safe medium-sized bowl, beat an egg. Add milk, water and butter.
Microwave on HIGH for about a minute and a half until the mixture is 120º-130º. One of my best friends in the kitchen is a thermometer. I like the ones with the long cable because they are easier to read than ones that have the readout on the thermometer itself. If you’re going to buy one, make sure it goes up to 375º or so. That way you can use it for frying as well. I bought a kitchen thermometer once without realizing that it was specifically for meat and it only had readouts up to 225º. Bummer. This one by Polder is wonderful. It’s about $20. You need it.

Pour the milk mixture into your breadmaker (or your mixing bowl if you’re using a mixer instead). Then add the rest of the ingredients in the order listed. I like to add about 4 1/4 cups of flour unless it’s a really humid day. Then I’ll add 4 1/2. (If you’re using a mixer, mix all the dry ingredients together first. If you are using a mixer AND regular old yeast, put the yeast in the bowl with the milk mixture. Let it sit for about 10 minutes or so. This is called proofing. It’s a drag and you don’t have to do it if you use Instant or Rapid-rise yeast. Now you know. Carry on with the rest of the recipe.)

(see that writing on the side of my bread machine pan? When I find a recipe that I love and make all the time, I write it on the side with a sharpie, that way I don’t have to get out my cookbook. That is just way too much work. I have recipes on all four sides of this pan.)

Set your bread maker on the dough setting (or whatever setting that will mix the dough and let it rise without baking it.) If you are using a mixer, knead the dough for about 8 minutes, then let it rise til it’s doubled in size. It will still be kind of lumpy and jaggedy. That’s quite all right.
Now you’ll take the dough and turn it out onto a floured surface. If it’s sticky add some more flour. You’ll knead it for a minute or so, then divide it into three equal sections (this makes a big ol’ loaf of bread, so if your family is on the smaller side you might want to make two smaller loaves and give one to a neighbor. They will love you! If that’s the case, divide the dough into six equal pieces–three for each loaf– and carry on just the same. Bake the smaller loaves on the same cookie sheet, but for about 6-10 minutes less.)

You will then roll each of these sections into a long, thin snakey-looking shape about 20-24 inches long (14-18″ if you’re making two smaller loaves). You can roll it out any way that catches your fancy, just don’t try to pull it that long; it will rip. Once you’ve made snakes out of all three sections of dough, pinch the ends together tightly on one side only.

Now we’re going to braid your bread! This will feel so blissfully domestic your head will almost explode. Feel free to call everyone around to admire your handiwork. (Remember to pinch the other end of your braid when you’ve finished!)

At this point you will pick up one end and gently tie the braid in a knot around itself, tucking the ugly ends underneath. This sounds complicated but it’s not. Promise.

Gorgeous! Now you’ll put your loaf on a cookie sheet and let it rise in a warm place until the dough has almost doubled in size (about 30-45 minutes depending on how warm the yeast is). Preheat your over to 350º and move the shelves around so there is plenty of room for your bread to grow. This sucker is going to get pretty big.)

Here is a nifty trick I use all the time when baking bread. Loaves tend to get quite brown on top by the time they’ve cooked all the way through. I hate really brown bread. It’s ugly and it’s usually really hard. So I bake my bread with a paper towel over the top. It allows the bread to brown, but not excessively. It will not burst into flames (unless you touch it against the heating element but I’ve only done that once in my whole life).
Bake the bread for about 30-40 minutes until it’s done. But how are you supposed to know when it’s done exactly? Some people suggest turning the loaf over and tapping it to see if it sounds hollow. But who wants to touch 350º bread? Plus I don’t think bread really sounds all that hollow. Here is the way to tell if your bread is done: Get out your thermometer again. Bread is perfect when it’s 190º. Stick the thermometer into the middle of the loaf after 30 minutes and see what it says.

Remove your bread from the oven and slide it onto a cooling rack. Get a chilly stick of butter out of the fridge and unwrap it a bit. Rub the butter all over the loaf so it’s nice and shiny. I serve my Braided Herb Bread on a platter wrapped in a clean tea towel. Since it’s got such a lovely taste (and since you just rubbed butter all over the outside), it doesn’t really need to be served with butter. I just let everybody tear off a piece and pretend we’re French peasants. This bread definitely looks amazing, but it also tastes amazing. People will love you for this!

Happy baking!

I am going to try a Corn Free and Gluten Free version of this with my new King Arthur Gluten Free Flour… and am digging out one of many bread makers from the archive files in the laundry room… so enjoy… I promise to take pictures…

Gluten Free does not mean Corn Free :(


I was in a rush when shopping and was so excited to see the new stack of boxes in the Gluten Free Isle…I grabbed without reading.  I also baked without reading.  Luckily I had hungry mouths who were extra in the house… and I sent the balance home with them…

They may have been gluten free but the corn starch was right there …

so easy to use potato starch… ugh…brownies dancing before me that I can’t taste…

Such a sad time for me cause I could just taste them as the aroma of them baking was filling the house… such a tease…

At least the cake mix is an ok item… lesson learned…

Namaste

Tammye Honey

German Goulash


German Goulash

My hubby decided to give me a lesson in German Cooking last night and insisted that I take pictures of the process.  So here you go…

Starting with a pound of basic stew beef…

Cut into small pieces then place into a sprayed pot and brown.

Make sure to brown all sides.

Drain off all excess water and fat from the beef.

Add secret ingredient…

Knorr Goulash Beef Stew Recipe Mix

Thoroughly fold mix into meat and make sure all meat is covered with the mixture.

Will look like this when blended

Add 3 cups of water

Stir well

Bring to a boil then set to simmer till meat is tender

We serve with Brochen

Which we put butter on then dip into the goulash

Serve with potato salad or slaw and you have a meal.

That was my cooking lesson for last night.  I hope that you enjoy…Should be able to find the Knorr Goulash Beef Stew Mix at your local market in the spice dept. or dry soup isle or

http://www.letsmakeknorr.com

Happy Cooking,

Tammye Honey

Mint Chocolate No Bake Cheesecake


Mint Chocolate No Bake Cheesecake

by Jamie on July 6, 2012

Mint Chocolate No Bake Cheesecake

Yield: 8-10 servings

Prep Time: 10 minutes plus chill time

Ingredients:

1 (8 ounce) package cream cheese, softened
3 tablespoons granulated sugar
1/2 teaspoon pure vanilla extract
1/8 teaspoon pure peppermint extract
1 (8 ounce) tub frozen whipped topping, thawed
12 Andes Creme de Menthe Cookies, finely chopped (see note below)

Directions:

1. In a large bowl, with an electric mixer, beat the cream cheese and sugar on medium-high speed until smooth and creamy, about 3 minutes. Add in the extracts and mix until well combined, scraping down the sides of the bowl as needed. Using a rubber spatula, fold in the whipped topping until until it is fully incorporated into the cream cheese mixture. Fold in mint chocolate cookies.

2. Spoon the filling into a pastry bag or large zip top bag. Snip enough of the end off the bag to allow you pipe the mixture into your desired serving glasses. I alternated layers of the cookies and cream cheese mixture with chopped cookies.
3. If desired, garnish with additional whipped topping and chopped cookies.

Notes:

– If you cannot find the Andes Creme de Menthe Cookies, feel free to substitute Mint Oreos.
– I have not attempted this recipe with a substitute for the frozen whipped topping (Cool Whip).
– – Mini Cordial Glasses are from Pier 1 Imports, the spoons are from Ikea.
– Using the Mini Cordial Glasses seen above will yield 8-10 servings.

Source: My Baking Addiction

http://www.mybakingaddiction.com/mint-chocolate-no-bake-cheesecake

My mouth is drooling with allergy pill bottle in hand …oh yeah it is…

Enjoy…

Tammye Honey

Easy Spinach Lasagna Recipe


Difficulty: Easy | Total Time: 1 hr 40 mins | Makes: 8 to 12 servings

Making a proper lasagna is all about a harmonious ratio of filling, cheese, sauce, and noodles. For this spinach and cheese version we’ve skipped the béchamel sauce found in traditional lasagnas to make the dish fast and easy to assemble. Combine frozen spinach, Parmesan cheese, ricotta cheese, and an egg for the filling and layer it with sauce, noodles, and mozzarella cheese. Bake until browned and bubbly, and serve with a simple salad or vegetable side for a cozy vegetarian meal.

This recipe was featured as part of our lasagna recipe slideshow.

INGREDIENTS
  • 1 (15- to 16-ounce) container whole-milk ricotta cheese
  • 2 (10-ounce) boxes frozen spinach, thawed and excess liquid squeezed out
  • 1 cup finely grated Parmesan cheese (about 3 ounces)
  • 2 medium garlic cloves, minced
  • 1 large egg, lightly beaten
  • Kosher salt
  • Freshly ground black pepper
  • 2 (14.5-ounce) cans tomato sauce or jarred marinara sauce
  • 1 (8- to 9-ounce) box no-boil lasagna noodles (12 noodles)
  • 1 pound whole-milk mozzarella cheese, sliced 1/4 inch thick
  • Vegetable or olive oil
INSTRUCTIONS
  1. Heat the oven to 350°F and arrange a rack in the middle.
  2. Place the ricotta, spinach, half of the Parmesan, the garlic, and the egg in a large bowl and season with salt and pepper. Mix until combined.
  3. Spread 3/4 cup of the tomato sauce in a thin layer over the bottom of a 13-by-9-inch baking dish.
  4. Construct the lasagna by layering 3 of the noodles over the sauce. Top with another 3/4 cup of the tomato sauce and spread it evenly to the edges of the dish. Using a small spoon, dollop a third of the ricotta mixture (about 1 cup) evenly over the sauce and flatten the dollops with the back of the spoon (the ricotta mixture will spread out more when it heats up). Evenly lay a quarter of the mozzarella slices over the ricotta.
  5. Make 2 more layers of noodles, sauce, ricotta mixture, and mozzarella. Top with the remaining noodles, sauce, and mozzarella. Evenly sprinkle with the remaining Parmesan. Coat 1 side of a large piece of aluminum foil with vegetable or olive oil and cover the dish tightly with the foil, oil-side down.
  6. Bake until the sauce is starting to bubble around the edges, about 40 minutes. Remove the foil and continue baking until the top is browned, about 20 minutes more. Remove the pan to a wire rack and let cool for 15 minutes before slicing.

Another recipe for Spinach oh yeah…even though I read last night that too much cooked spinach is not good for you I am still craving it…lol…it is my favorite veggie

http://www.chow.com/recipes/30277-easy-spinach-lasagna

So love this website…


Cheese & Olive Damper


From , former About.com Guide

http://australianfood.about.com/od/savorybaking/r/CheeseDamper.htm

Damper is a yeast-less bread that was traditionally eaten in Australia by early colonial settlers.

It was simply made of flour, salt, sugar and either water or less frequently, milk.

Damper was cooked in the ashes of a fire or wrapped around a stick and cooked over an open flame. It would be consumed with whatever condiments were handy such as sliced of meat or golden syrup.

In this recipe, I’ve given traditional damper a face-lift with the addition of black olives, Parmesan cheese and butter.

Making delicious bread has never been easier!

Ingredients:
  • 3 cups self-raising flour
  • 1/2 tsp sea salt
  • 1 tsp sugar
  • 75g of chilled butter, cubed
  • Scant 1 cup of black, pitted olives, sliced
  • Scant cup of freshly grated, loosely packed Parmesan cheese
  • 1/2 cup of milk
  • Butter for spreading
Preparation:
  1. Pre-heat the oven to 350F.
  2. Grease a baking tray and line it with baking paper. Lightly grease the baking paper. Set aside.
  3. Mix together the flour, salt and sugar in a bowl. Use your fingertips to rub butter into flour mixture until the mixture resembles small breadcrumbs.
  4. Mix in the Parmesan cheese. Next, mix in the sliced olives.
  5. Add the milk and 1/2 cup of cold water to flour mixture. Stir with a wooden spoon until the mixture forms a sticky dough. Add a little extra water if necessary to moisten the dough slightly.
  6. Turn the dough onto a lightly-floured surface. Gently knead it until it’s just smooth — about 4 times.
  7. Shape dough into a 15-20cm round. Place the round on the prepared baking tray.
  8. Rub some flour on a sharp knife and score top of damper into 8 wedges.
  9. Bake for 40 to 50 minutes or until golden. Tap the bread and if it sounds hollow, it’s ready.
  10. Let the bread stand on the tray for 5 minutes and then place it on a wire rack to cool.
  11. Serve with a little butter and a hot cup of sweet tea.
  12. Store the damper in an airtight container for up to a week. It can also be frozen and toasted.


I stumbled across this recipe and could not resist sharing as I am dying to try with my new flour that is from Robin Hood and is the Gluten Free Flour… will let you know how it comes out…

Tammye Honey

Spinach Pesto With Barilla Tortelloni Ricotta & Spinach Dinner For Two


This Barilla Brand Tortelloni Ricotta & Spinach with the added Spinach Pesto Sauce is just out of this world in flavor.

Basic Spinach Pesto Sauce Recipe

3 tbsp. garlic minced in oil

1/4 cup walnuts

1 tsp crushed basil

1/2 tsp salt

1/2 tsp white pepper

chop together

add fresh spinach or 1 pkg of thawed and drained chopped spinach

chop together

Slowly simmer in small pan slightly covered

I add just a small amount of butter for flavor

stir and check often to make sure it is not sticking while cooking your pasta

drain pasta and add pesto to your pasta back into the pasta pan and toss

For this dish I used the entire package of baby spinach…

It was so good I went back for seconds and I normally can hold back and resist seconds…

Happy Cooking…just had to share the update…