Beef and Broccoli


Thanks to a good friend of mine from Facebook Ann Ball, who publishes recipes daily

(For more recipes, motivation and inspirations join My Weight Support Group: www.facebook.com/groups/aspiredtotransformation

Always looking for new Friends. FRIEND MEhttps://www.facebook.com/ann.ball.73 )

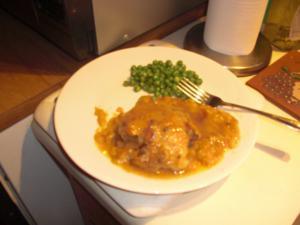
I happened to have stumbled across this recipe the other day and modified it slightly due to my corn allergy.  I still have not found a substitute for soy sauce so it was not totally corn free (sadly) so the allergy pills still had to be taken each time I ate it.  I decided to make just enough rice per each meal so that the rice was hot and fresh each time that we ate.  We had several meals from this dish and I took the left over gravy and froze it to use as a base for the next time that I make the dish.

Crock Pot Beef and Broccoli

10300079_10204015023721400_6278386827162361306_n

Ingredients:
1 pound boneless beef chuck roast, sliced into thin strips
1 cup beef or chicken consumme or broth
1/2 cup soy sauce
1/3 cup brown sugar
1 tablespoon sesame oil (I put in 2 tbsp)
3 garlic cloves, minced (I put in 3 heaping tbsp minced garlic in olive oil)
2 tablespoons cornstarch (I used potato starch in its place)
2 tablespoons sauce from the crock pot after being cooked
Fresh broccoli florets (as many as desired) I used frozen
Hot cooked rice

Directions:
1. Place beef in a crock pot.
2. In a small bowl, combine consomme, soy sauce, brown sugar, oil, and garlic. Pour over beef. Cook on low for 6-8 hours.
3. In a cup, stir cornstarch and sauce form the crock pot until smooth. Add to crock pot. Stir well to combine.
4. Add broccoli to the crock pot. Stir to combine.
5. Cover and cook an additional 30 minutes on high (the sauce has to boil for it to thicken).
6. Serve over hot cooked rice.
Source: Xtreme Fat Loss Diet

This is a new favorite in our home that actually got my hubby to like broccoli even more.  Hope that You like it as well.

Have a great day,

Tammye Honey
Dinner In A Hurry


When I found out that I was going to have hungry grandchildren to visit yesterday I wanted to make something quick and easy so that I could sit and visit while it cooked.  Due to a time crunch on the visit as the boys had to return home to get ready for school for today it had to be a quick meal.  Their mom had said that she could pick up a pizza on the way.

Homemade and nutritious for me always wins hands down.  I said I had already started to just come and visit.

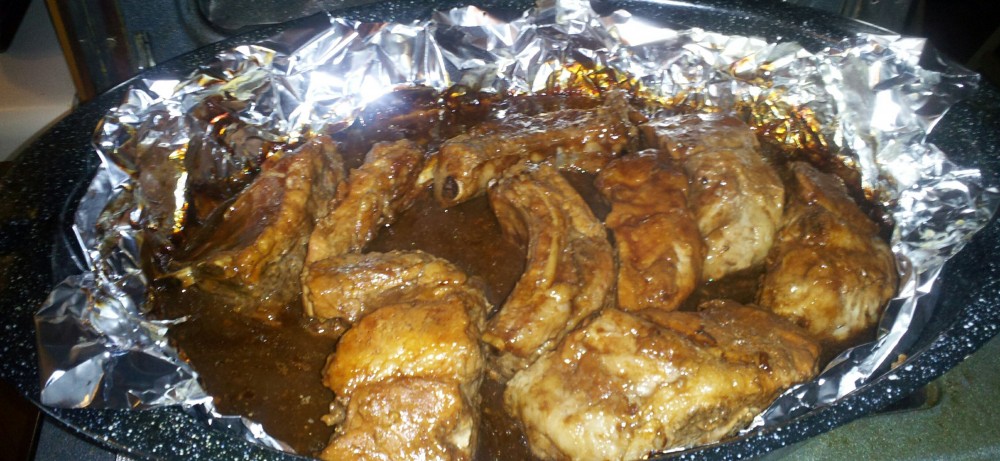
I took chicken thighs and placed them in my roaster pan where I poured Wishbone Lite Italian Dressing on them enough to well coat them.  I covered with foil and placed them in the oven at 350 F.

I then proceeded to peel potatoes.  Both yellow butter and Red potatoes since I did not have enough of the yellow butter ones.  I placed them in a pan of water cubed with a hint of sea salt and let them boil with the cover slightly ajar.

I then took one container of Vanilla Yogurt, a container of Sour Cream, several varieties of fruit that I had (Mine were canned although frozen do work well) and 1/4 cup of marshmallows  I mixed them together in the bowl and let them sit in the fridge.

I was able to sit and visit, only being interrupted by my timer every fifteen minutes to turn the chicken.

The potatoes were finished and we added one stick of butter and one container of sour cream to whip them with the beater..

The thighs were done and we ate.  The meat fell easily from the bone and was very tender.  To have the boys comment how good the chicken was felt good.

They were surprised when I said that I had dessert.  First response was “What is that?”  I handed each a fork to stick in the mixture to taste.

Each had a big bowl of it and the last one finished the bowl.  I had a bag of coconut on the side to sprinkle on the top if the wanted it.  (I do not care for coconut so it always is a side option for me.)

A side salad was the other option which was offered.  Simple cherry tomatoes and romaine lettuce with a choice of dressings.

Complete meal that was quick and easy with no measuring and I was able to spend time with my guests.

Thank you for reading.

Tammye Honey

Buttermilk Biscuits with Sausage Gravy


I opened my emails this morning to find the top one from my hubby.  We do live in the same home, this is just another way of us to communicate when he is up late at night and wants to tell me something or show me something when I am sleeping.

Here it was:

http://www.recipe4living.com/recipes/biscuits_and_gravy.htm

Ingredients

  • 1 lb. Jimmy Dean premium pork or turkey sausage
  • 3 Tbs. corn starch
  • 3 C. milk
  • 1 Tbs. butter
  • 1 can. pre-made biscuits (i.e. Grand’s home style)

Directions


Preheat oven to 350 degrees. In large skillet, cook sausage until fully cooked. When cooked, do not drain. Add butter, and cornstarch, stir until cornstarch is dissolved into the sausage. By this time you’ll want to start putting your biscuits in the oven, bake for 15-20 minutes or until golden. Once done, slowly begin to add the milk to the gravy mixture.  Add about a cup each time continuously stirring. Season to taste. Pour your gravy on your biscuits to serve.

http://www.recipe4living.com/recipes/homemade_sausage_gravy_and_biscuits.htm

Ingredients

  • 1 lb. Tennessee pride mild sausage
  • 1/2 gallon milk
  • 8 biscuits
  • Salt and pepper to taste
  • Corn starch

Directions


Break up and brown sausage well. Drain and add salt and pepper, mix until brown. Add milk a little at a time to get it brown. Let it cook down until it’s brown again, then add remaining milk. Simmer 15 minutes. Stir well, add corn starch to thicken. Serve over hot flakey biscuits.

http://www.recipe4living.com/recipes/mind_blowing_buttermilk_biscuits_recipe.htm

Time needed

15 min preparation + 12 min cooking

Serving Size / Yield

6 servings

Ingredients

  • 2 C All purpose flour
  • 1 Tbs Baking powder
  • 2 tsp Sugar
  • 1/2 tsp Cream of tartar
  • 1/4 tsp Salt
  • 1/4 tsp Baking soda
  • 1/2 C Lard (or shortening)
  • 2/3 C Buttermilk (or sour milk)

Directions

In a medium mixing bowl stir together flour, baking powder, sugar, cream of tartar, salt, and baking soda. Using a pastry blender, cut in lard (or shortening until mixture resembles coarse crumbs. Make a well in the center of dry mixture, then add buttermilk (or sour milk) all at once. Using a fork, stir (just until moistened).
Turn the dough out onto a lightly floured surface. Quickly knead the dough by gently folding and pressing the dough for 10 or 12 strokes or until the dough is nearly smooth. Pat or lightly roll dough to 1/2 inch thickness. Cut dough with a floured 2 1/2 inch biscuit cutter, dipping the cutter into flour between cuts.
Place biscuits on an ungreased baking sheet. Bake in a 450F oven for 10 to 12 minutes or until the biscuits are done. Remove biscuits from the baking sheet and serve hot.


I think he was trying to give me a hint to change to gluten free flour and rice or potato starch and make this lol…

Will make and record just had to share…

Homemade Shrimp Bisque


After reading a fellow blogger’s post this morning, I was suddenly starving and drooling for a homemade soup since it is so cold outside.

cold weather

Did you say hush… oh you sound just like my hubby…guess you are right…it could be worse, I could be braving the New York State Winter like I used to as I am letting the dogs out in my slippers and sweat shirt lol….

http://rantingchef.com/2013/01/22/soup-roulette/

In case you are wondering what inspired me this morning…. Hey where are you going?

Okay , he is great and has some really great recipes and some great guest bloggers on his site too.  I have even guest blogged there before.  Hurry back as I am about to give you the lowdown on my recipe.

Thanks for coming back, phew…was worried there for a second.

sweating picture1


Since my allergies are so bad to corn, I use all natural ingredients and fresh ingredients as much as possible in our foods so that I am not running for my allergy medication or even worse, my epi pen.


I started my soup with a few simple ingredients that I just happen to have in stock.

CIMG2496


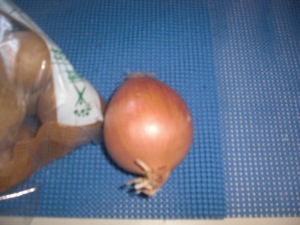
A medium onion

CIMG2497

Some potatoes either red or yellow

CIMG2498

Shrimp (Take the tails off)

CIMG2499

Daisy Brand Sour Cream

CIMG2500

Fresh Baby Carrots

CIMG2501

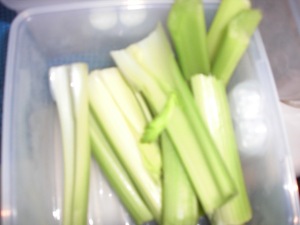
Fresh Celery

CIMG2502

Fresh Sliced Mushrooms

CIMG2503

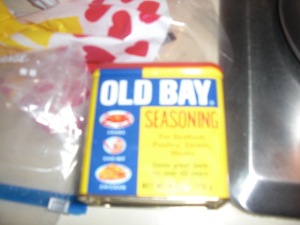
Old Bay Seasoning

milk

CIMG2504

CIMG2506

Paprika (I happen to use the tube however this is fine)

CIMG2509

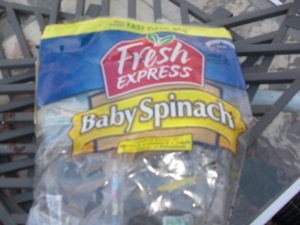
You can’t beat fresh baby spinach

(Had already thrown bag out when I realized I had not taken a picture sorry)

CIMG2510

Swanson does make it better for certain with their chicken broth

CIMG2508

My Vidalia Chopper is priceless in my kitchen for chopping my vegetables to a perfect size for all of my creations.  It is a must have for every kitchen.  It is quick and easy and super fast cleanup too.

I throw all my ingredients in the pot suited to how much of each item that we prefer as my hubby likes a lot more potato and more shrimp than the average person.  A full bag of spinach and easy on the mushroom, carrots and celery yet enough for flavor.  One to two containers of the sour cream depending on your taste and since my hubby does not like a thick soup I do not add a thickener and do add milk here…by now I am sure you know what milk looks like.  So I did not take a picture of our milk container.  Here would be a great spot to explain the thicker that I do use…I either normally use rice starch or potato starch and just a few teaspoons will do you.

Simmer slowly and enjoy the aroma till the veggies are soft.

Voila… serve in a bowl or to be creative in a bowl of carved bread.

Eat Healthy and enjoy,

Tammye Honey

Related articles

Guest Blogger on The Ranting Chef


So happy to be a guest blogger here today…check out this great Chef daily for some really great recipes… The Ranting Chef…Thank You for this opportunity to be a Guest Blogger on Your Site…

ranting chef

The Ranting Chef

chicken

Vagabond Chicken

5 Chicken Thighs

2 Red Delicious Apples (Cored, Peeled and Chopped)
1/4 cup of Shredded Sharp Cheddar Cheese (Kraft Foods)
1/4 cup of Feta Cheese (Athenos)
1/4 Cup of Mediterranean Herb Cheese (Cracker Barrel)
4 cups of homemade bread cubes
2 tbsp butter
1/2 cup of dry white wine (Beechaven is a local winery)
1/2 cup vegetable (or Chicken) Stock
1 tbsp water
1 1/2 tsp potato starch (or rice starch)
My sauce:  1/2 cup dry white wine, 1/2 cup vegetable broth, 1 cup apple sauce (unsweetened) with a generous addition of cinnamon, nutmeg, salt, white pepper, vanilla and honey to taste.  I added the Potato Starch to thicken.
1. Combine apple, cheese, and bread crumbs. Set aside.
2. Flatten chicken breasts between sheets of waxed paper to 1/4 inch thickness. Divide apple mixture between chicken breasts, and roll up each breast. Secure with toothpicks.
3. Melt butter or margarine in a 7 inch skillet over medium heat. Brown stuffed chicken breasts. Add wine and 1/4 cup water. Cover. Simmer for 15 to 20 minutes, or until chicken is no longer pink.
4. Transfer chicken to a serving platter. Combine 1 tablespoon water and cornstarch; stir into juices in pan. Cook and stir until thickened. Pour gravy over chicken, and garnish with parsley. Serve.
Hope you do not mind the modifications, the taste was great and even hubby liked it all…

Hope you enjoy both his blog site and my recipe….See his original version of this recipe also as mine has been modified due to corn allergies.

Have a delicious day….

Tammye Honey

Rantings of an Amateur Chef

Very few recipes are meant to be static. They are best as they evolve and every different chefs put their own special take on them. I am really happy that today’s guest blogger, Tammye from tammyehoney, has taken a recent recipe that I posted and made it her own. Check out Tammye’s version and check out her site tammyehoney

My husband is a retired Warrant Officer from the Army.  We were married on 9/9/2009 without realizing the date… We live in a small rural community called Woodlawn, TN which is just outside of Clarksville, TN and Ft. Campbell, KY.  We have a quaint ranch home with a few acres of land that is just enough to keep our two dogs and two cats happy.  (Also our lawn care people who are locals).  We have a fixed income since he has the pension and I am disabled.  Cooking is something…

View original post 504 more words

Daily Prompt: 32 Flavors


http://dailypost.wordpress.com/2013/01/10/daily-prompt-ice-cream/

»

Daily Prompt: 32 Flavors

by michelle w. on January 10, 2013

Vanilla, chocolate, or something else entirely?

When I first saw this post it seemed like such a challenge as due to my corn allergy, ice cream is not on my list of foods that I can eat.  Then the wheels began to turn and it seemed like a good challenge to be able to name 32 flavors….

  1. Vanilla is wonderful and goes with any dessert.VanillaSince it can be in the soft serve or the traditional hard serve this is a must to all menu choices.
  2. Chocolate…another all time favorite.chocolateAnother favorite that is made in soft or the traditional hard serve.
  3. Strawberry…Wow I just built a Neapolitan ice cream would that be fair to call that #4 lol.

strawberryYou rarely see this one in soft serve, perhaps the real strawberries clog up the machine.

4.  Raspberry this is a great flavor as it comes in both sherbert and in regular ice cream.

raspberryThen there are all the variations of the raspberry such as black raspberry and raspberry creme.

5. Pistachio This flavor is one of those that you love or hate…

mountains of ice cream6. Cherry Chip

7. Butter Pecan

8. Coffee

9. Pineapple

10. Chocolate Swirl

11. Mint Chip

multiple choice

12. Orange Sherbert

13. Rocky Roads goes with out saying

rocky RoadsI noticed that quite a few companies are now making this flavor

14. Chunky Monkey

chunky monkeyThis is the one and only to get if you are into Chunky Monkey…I can only imagine lol… Thank you Ben & Jerry’s.

I am exhausted at 14 and feel as if I have gained 20 pounds lol..

So I decided to stop here and suggest that you locate a Ben & Jerry’s in your area to finish the list for yourself…

http://www.benjerry.com/scoop-shops

They have more than enough flavors alone to finish my list for me.  I could cheat and copy them all but it seems like more fun to send you to their shoppes instead.

There is always Baskin Robins

Baskin Robbins

They might also be in your neighborhood…. http://www.baskinrobbins.com/content/baskinrobbins/en.html#

Well I am back to my low caloric sewing project and just the memories of ice cream…

Have a great day and check out what my fellow bloggers had to say on the matter…

Tammye Honey


  1. Daily Post: 32 Flavors | tel-uh-vizh-uh-ner-ee
  2. 32 Flavors [DailyPrompt] « Q the Adult
  3. Daily Prompt: 32 Flavors « Gooseyanne’s Blog
  4. A Super-Sweet Thank You | beyond back creek
  5. For the Love of Cookies and Cream | Ramisa the Authoress
  6. Daily Prompt: 32 Flavors « The Eclectic Eccentric Shopaholic
  7. A matter of taste « Hope* the happy hugger
  8. The Sky Is The Limit | Just Me
  9. Glowing Green Goodness | Sorta Ginger: Ramblings of a Quasi-Redhead
  10. Which flavour is the best? | Angel Frouk
  11. It’s My Opinion « jaschmehl
  12. That is not even a question ! « Spunky Wayfarer
  13. Daily Prompt: 32 Flavors | Stuph Blog
  14. MASH IT UP.. « ayimas
  15. A Mint Chocolate Chip Eulogy « charlottesville winter
  16. Daily Prompt~ 32 Flavors « The Cheeky Diva
  17. Vanilla Life | Sub•scrib•bler (səb-skrĭb′lər) n.
  18. Daily Prompt: 32 Flavors (Alana Davis!) « Too Much Music
  19. Daily Prompt: 32 Flavors | Daddy’s Naughty Little Girl
  20. Flavors | Pigments of Life
  21. Daily Prompt: 32 Flavors | Musical Foodie Love
  22. I Like Vanilla: Confessions of a Chocolate Maven | mycookinglifebypatty
  23. Among 32 favlours the chosen one! | The Nameless One
  24. Among 32 flavours the chosen one! | The Nameless One
  25. Red Velvet ~ 32 Flavors | Daily Prompt
  26. Daily prompt: 32 flavors | LooknWalk

New Bisquick Gluten and Corn Free


I had extra strawberries that I had to use up so I decided to make some short cakes to go with them with the new Bisquick I had found the last shopping trip.

With the recipe on the back and my muffin tin…it was a breeze and a quick and easy dessert that both my hubby and I can enjoy…

Since my camera is shy today…here is this recipe…

4 cups (1 qt) strawberries, sliced

1/2 cup sugar

2 1/3 cups Bisquick Gluten Free Mix

1/3 cup butter or margarine (I softened)

3/4 cup milk

3 eggs beaten

1/2 tsp vanilla

3/4 cup whipping cream, whipped

Mix strawberries and 1/4 cup of sugar (unless you like sweeter, add more); set aside.

Heat oven to 425F.  Grease cookie sheet or do what I did and place in muffin tins which I sprayed with butter Pam cooking spray.

In medium bowl, combine Bisquick mix, and remaining 1/4 cup of sugar (or a trace more for a sweeter roll) ; cut in butter with pastry blender or fork.  Stir in milk, beaten eggs and vanilla.  Drop by spoonfuls onto cookie sheet or place into muffin tins and I had enough to make a small loaf also.

Bake 10-12 min or until light golden brown Cool 5 min.  With serrated knife, split short cakes; fill and top with strawberries and whipped cream.

While warm I sprinkled sugar across top to give a nice sprinkle look.

Ate one for dessert…very filling.

Happy Cooking.

Namaste

Tammye Honey


Baking with Corn Allergy


  1. Keep staple baking ingredients such as yeast, cream and butter on hand. This way, you can whip something up without having to go to store to get the necessary ingredients. It doesn’t quite overcome the convenience of prepared foods, but it sure helps to satisfy cravings. Yeast can be stored in the fridge and butter in the freezer for months.
  2. Get rid of the baking powder! It has cornstarch in it. If you can’t find Featherweight Baking Powder (made with potato starch), use 1/2 teaspoon cream of tartar and 1/4 teaspoon baking soda for 1 teaspoon baking powder. I’ve been doing this for years, and no one has noticed a difference in my foods, even biscuits.
  3. Make your own vanilla. Buy a 750 ml bottle of potato vodka, stick 2 vanilla beans in it, and let it sit for a month or two. Yummy, and actually cheaper than pure extract. I have heard that Frontier’s vanilla has corn alcohol in it, but their other extracts seem to be safe (I use them).
  4. Use this substitution for corn syrup: 1 cup corn syrup = 1 cup sugar plus 1/4 liquid (water or whatever other liquid is called for in the recipe). I’ve also read that rice syrup can be substituted directly for corn syrup.
  5. Corn AllergensFor powdered sugar, add up to a tablespoon of potato starch to 1 cup sugar, and blend in a coffee grinder until it’s not grainy; I often run it through twice. I also keep a bowl of it handy for when I need it quickly; just stir or sift it first to break up any clumps.

http://www.cornallergens.com/food/corn-free-cooking-baking.php

Love this website for great tips when I need it desperately like today…

Happy Cooking

Namaste

Tammye Honey

Gluten Free does not mean Corn Free :(


I was in a rush when shopping and was so excited to see the new stack of boxes in the Gluten Free Isle…I grabbed without reading.  I also baked without reading.  Luckily I had hungry mouths who were extra in the house… and I sent the balance home with them…

They may have been gluten free but the corn starch was right there …

so easy to use potato starch… ugh…brownies dancing before me that I can’t taste…

Such a sad time for me cause I could just taste them as the aroma of them baking was filling the house… such a tease…

At least the cake mix is an ok item… lesson learned…

Namaste

Tammye Honey
Cheese & Olive Damper


From , former About.com Guide

http://australianfood.about.com/od/savorybaking/r/CheeseDamper.htm

Damper is a yeast-less bread that was traditionally eaten in Australia by early colonial settlers.

It was simply made of flour, salt, sugar and either water or less frequently, milk.

Damper was cooked in the ashes of a fire or wrapped around a stick and cooked over an open flame. It would be consumed with whatever condiments were handy such as sliced of meat or golden syrup.

In this recipe, I’ve given traditional damper a face-lift with the addition of black olives, Parmesan cheese and butter.

Making delicious bread has never been easier!

Ingredients:
  • 3 cups self-raising flour
  • 1/2 tsp sea salt
  • 1 tsp sugar
  • 75g of chilled butter, cubed
  • Scant 1 cup of black, pitted olives, sliced
  • Scant cup of freshly grated, loosely packed Parmesan cheese
  • 1/2 cup of milk
  • Butter for spreading
Preparation:
  1. Pre-heat the oven to 350F.
  2. Grease a baking tray and line it with baking paper. Lightly grease the baking paper. Set aside.
  3. Mix together the flour, salt and sugar in a bowl. Use your fingertips to rub butter into flour mixture until the mixture resembles small breadcrumbs.
  4. Mix in the Parmesan cheese. Next, mix in the sliced olives.
  5. Add the milk and 1/2 cup of cold water to flour mixture. Stir with a wooden spoon until the mixture forms a sticky dough. Add a little extra water if necessary to moisten the dough slightly.
  6. Turn the dough onto a lightly-floured surface. Gently knead it until it’s just smooth — about 4 times.
  7. Shape dough into a 15-20cm round. Place the round on the prepared baking tray.
  8. Rub some flour on a sharp knife and score top of damper into 8 wedges.
  9. Bake for 40 to 50 minutes or until golden. Tap the bread and if it sounds hollow, it’s ready.
  10. Let the bread stand on the tray for 5 minutes and then place it on a wire rack to cool.
  11. Serve with a little butter and a hot cup of sweet tea.
  12. Store the damper in an airtight container for up to a week. It can also be frozen and toasted.


I stumbled across this recipe and could not resist sharing as I am dying to try with my new flour that is from Robin Hood and is the Gluten Free Flour… will let you know how it comes out…

Tammye Honey